it is really hard for me to write anything about our invitations. getting them out was such a huge, time consuming process. by far the biggest wedding project i have tackled. i am not a designer. let me repeat, i am NOT a designer! i really have no idea where to begin when it comes to putting together different elements and making them all work as a package, but i think that i somehow managed to pull it off here. luckily, i had the help of a friend who IS a designer. let's just allow the pictures to do most of the talking, shall we?
this is what you may have found in your mailbox in June if you were invited to our wedding:

a variety of vintage stamps and lovingly hand traced "calligraphy." it would mean you are an out-of-towner, since we sent our invites in waves and managed to get all of the first batch out in early june.
this is what you may have found in your mailbox in july if you were invited to our wedding:

ah, can we spot the differences? computer printed addresses. and we ran out of high value vintage stamps, so we probably just slapped a couple of forever stamps on your invite and called it a day. this also means you live in los angeles, because we mailed our local invites a month after our first wave. sorry guys, i was just a little tired of making them at this point. in retrospect, we should have made all the invitations together, so i wasn't so burnt out by the end. oh well, we live and learn right?
our return address on the back:

this is what all of our guests found when they opened the outer envelopes. the liner paper was a really expensive indulgence. it is hand screened and thick and amazing! i cut corners by not making our envelope liners full size (more on this in pt. 2)!

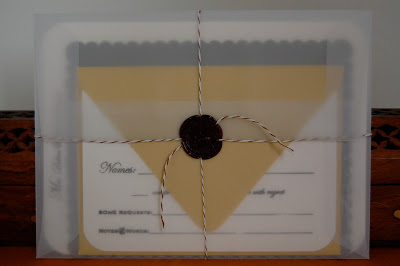
our inner envelopes were all tied up with twine and wax. i used a hot glue wax on some invites, and a real sealing wax on others. (the hot glue wax is pictured here.)

frankly, i have no idea if I followed "the rules" on putting these together. i read somewhere to tuck the reply card in the reply envelope and place that on top. put any extra cards/maps etc. under that, and then the invite under all of the above. i think i did this? Hopefully i didn't offend anyone!
front and back of sealed inner envelope:


once you managed to tear/bite/cut off the twine, and rip open the hard to tear envelope, this would be on top. our reply card and envelope. i used a mustard colored envelope and that same wood grain paper for liners.


we used a mix of forever stamps and the cute king and queen stamps on these cards.
under the reply card is our information card. we made it seem almost like a valet parking card, because we need to emphasize that all guests must use the valet service or their cars will be towed. our venue is in a residential neighborhood with no guest parking at all. i am so worried about people skipping the valet and trying to park their own cars and then being towed.iI am hoping everyone will read this card and remember to use the free valet!

the actual invitation card:


 on the back we printed lyrics from our favorite song. there is also a tiny spider dangling off of the banner (although spiders terrify me, they are also good luck!).
all together now:


behind the scenes of an invitation photo shoot (secret cat helpers):


stay tuned for project: invitations (pt. 2): cost breakdown, tips and tricks and maybe another cat or two!

Love the vintage stamps! Those invites look like they took a ton of work, glad you has secret cat helpers!
ReplyDeleteWOW. i would be so stoked to get something this fabulous in the mail. amazing :)
ReplyDeleteYour invites are so awesome! and your cats are adorable ( I have 3!)
ReplyDeletelisa@craftmybride.blogspot
thanks guys!
ReplyDelete